> For the complete documentation index, see [llms.txt](https://docs.chinapaymentsplugin.com/llms.txt). Markdown versions of documentation pages are available by appending `.md` to page URLs; this page is available as [Markdown](https://docs.chinapaymentsplugin.com/getting-started/setup-process.md).

# Quick Setup

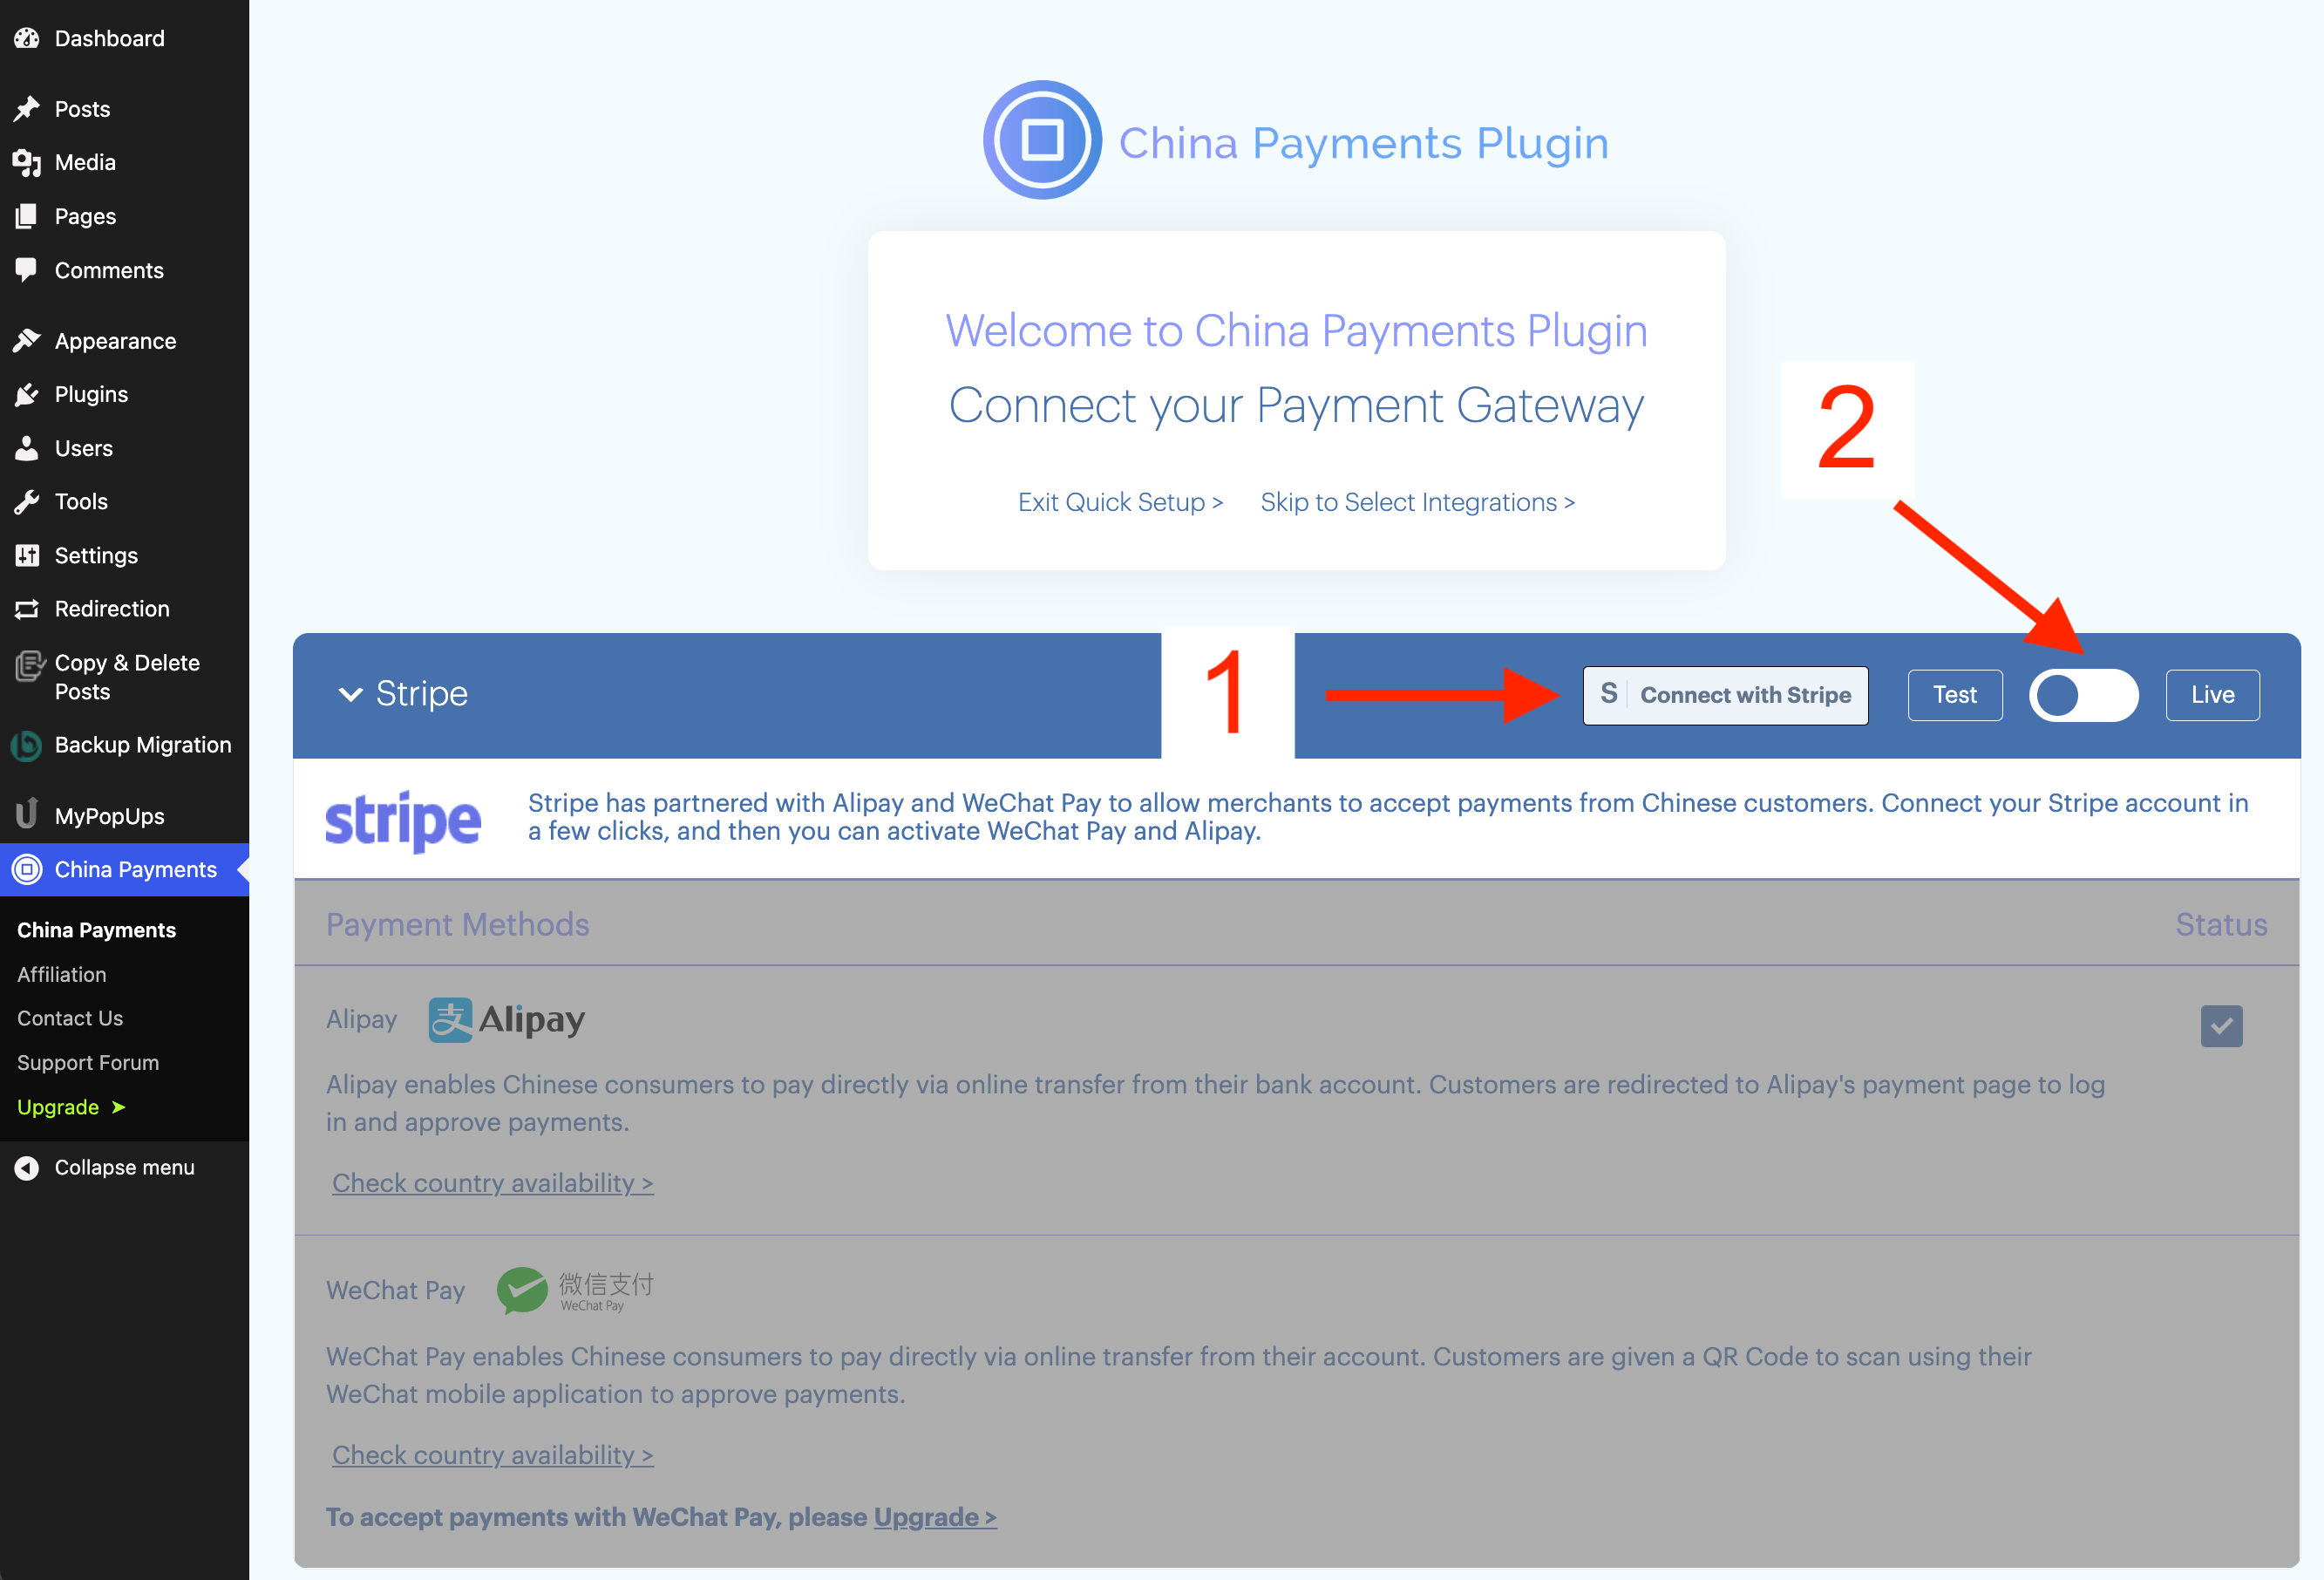
After installing China Payments Plugin in your WordPress Dashboard, you'll arrive to the Quick Setup Screen.

The first step is to connect your Stripe account (#1 in screenshot). You must connect Stripe independently in LIVE and TEST modes by using the switcher (#2 in screenshot).
![Quick Setup Flow for China Payments Plugin](/files/oIhgGnfL1kg9LIfzGhsG)

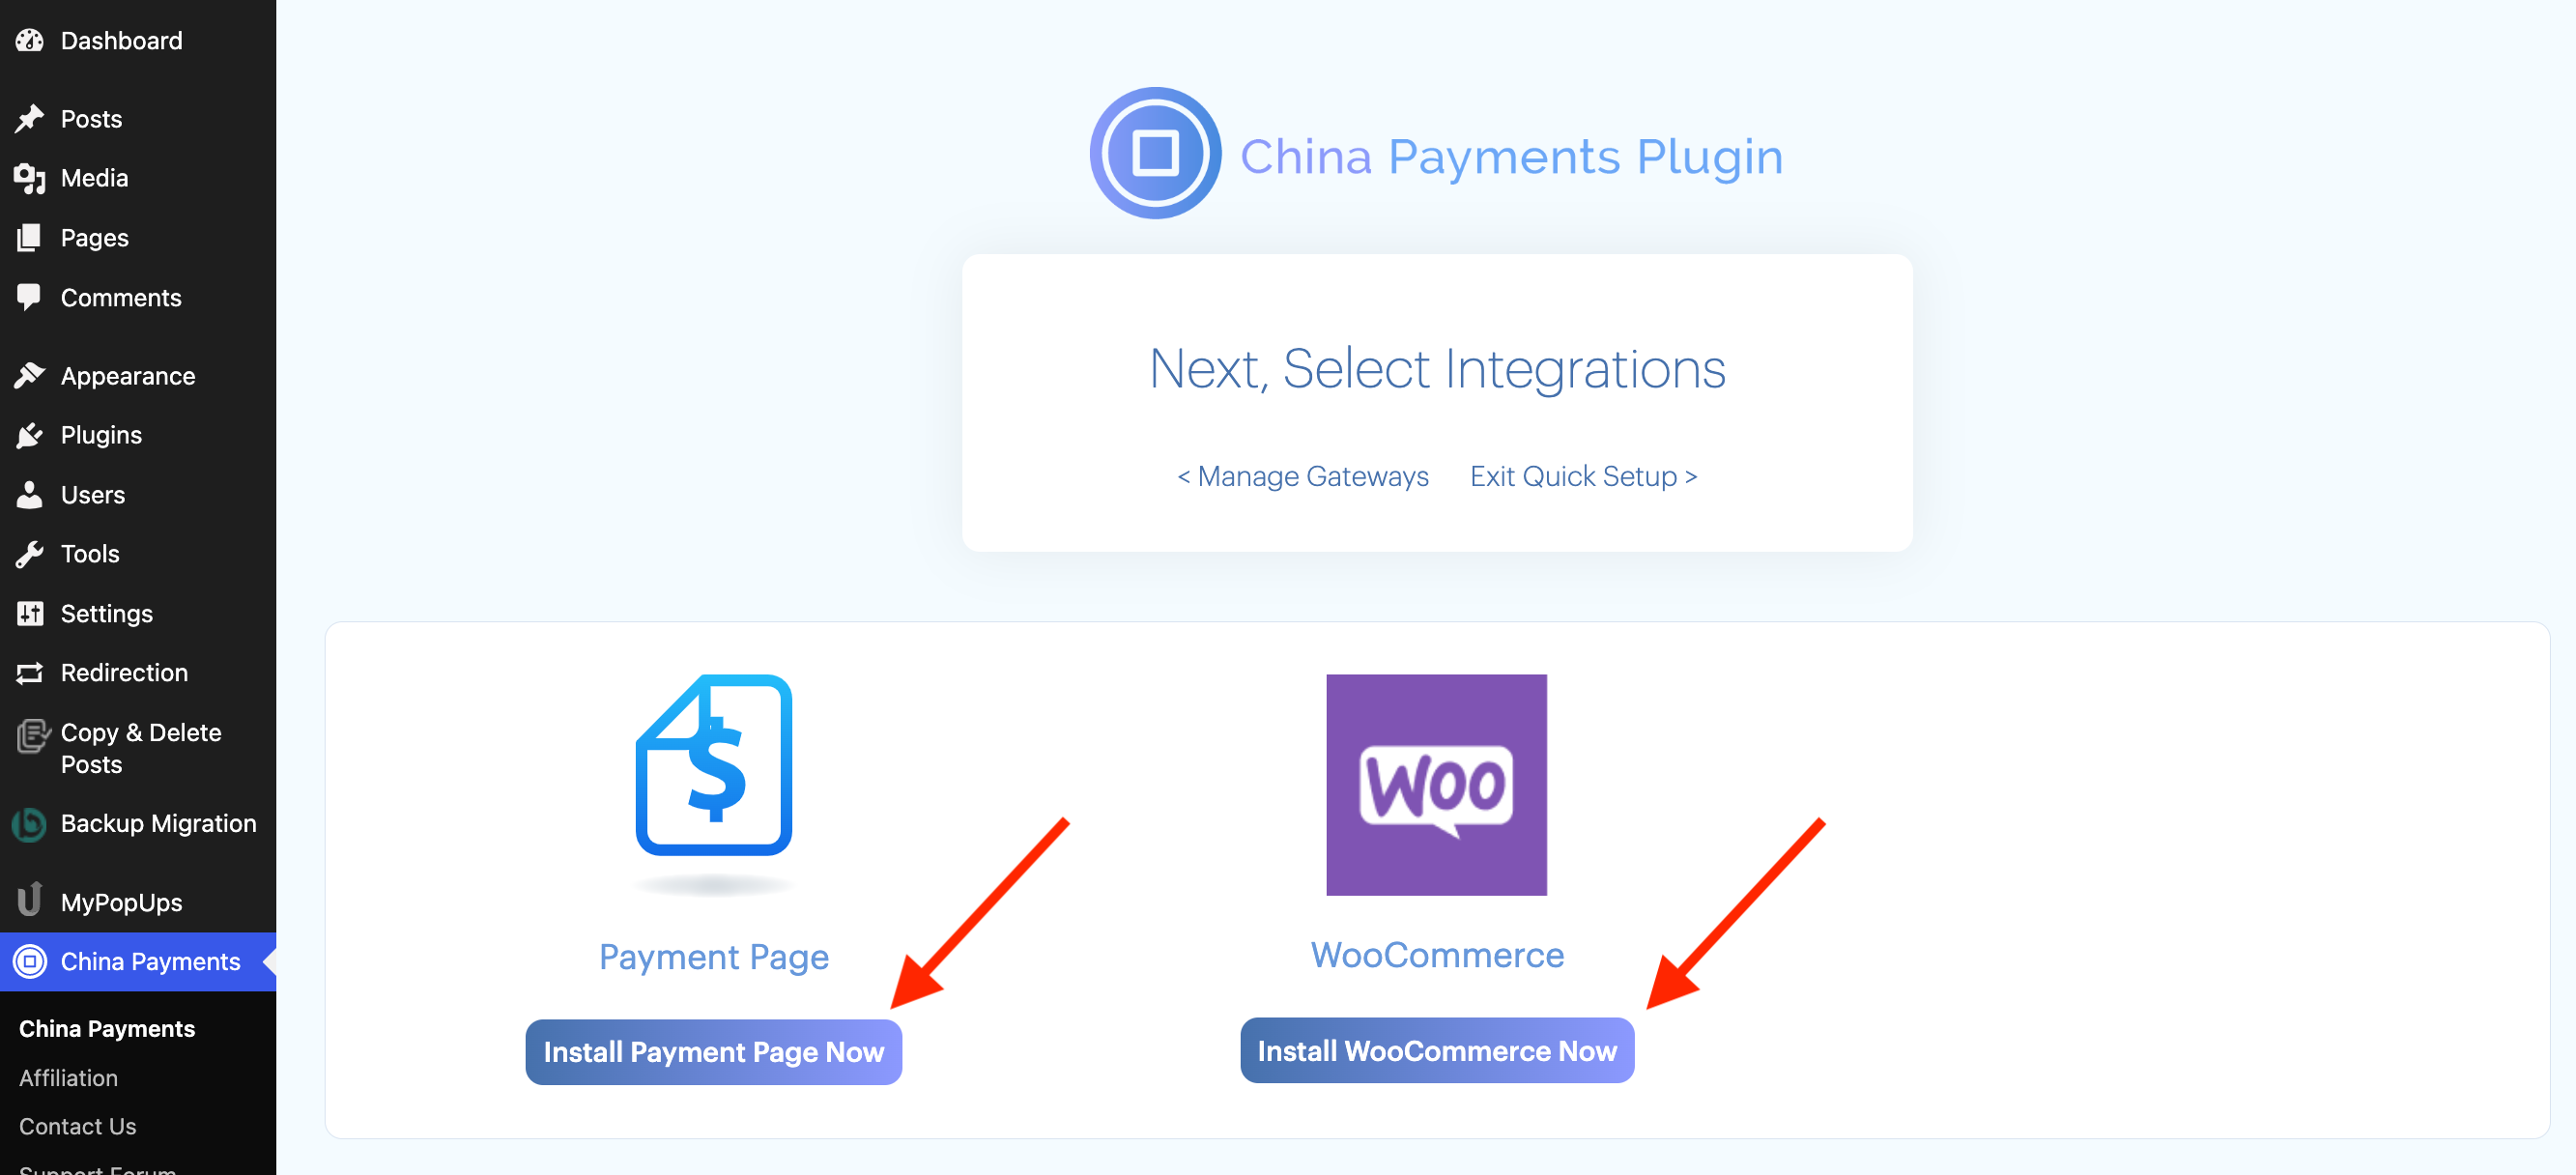
After connecting Stripe, you'll be directed to the Integrations step. Select any of the available plugin integrations to install:
![Install China Payments Plugin Integrations](/files/Leon4S42AeUbTfmp3Rbt)

{% hint style="success" %}
Ensure all payment methods are [fully activated on your Stripe account](https://docs.chinapaymentsplugin.com/getting-started/activating-payment-methods).
{% endhint %}

{% hint style="warning" %}
If using WooCommerce, [configuring Webhooks](/faqs/how-do-i-set-up-stripe-webhooks.md) is strongly recommended.
{% endhint %}

Please review our other docs to configure each of the Integrations:

{% content-ref url="/pages/-MdPJOHeOS1Eo0IivOKJ" %}
[WooCommerce](/checkout-flows/woocommerce.md)
{% endcontent-ref %}

{% content-ref url="/pages/-MdPK6m9UlI7EGoAd3R1" %}
[Payment Page (payment form)](/checkout-flows/embeddable-payment-buttons.md)
{% endcontent-ref %}

{% content-ref url="/pages/-MdPJYbGzLfOsEGbsD02" %}
[MemberPress](/checkout-flows/memberpress.md)
{% endcontent-ref %}
